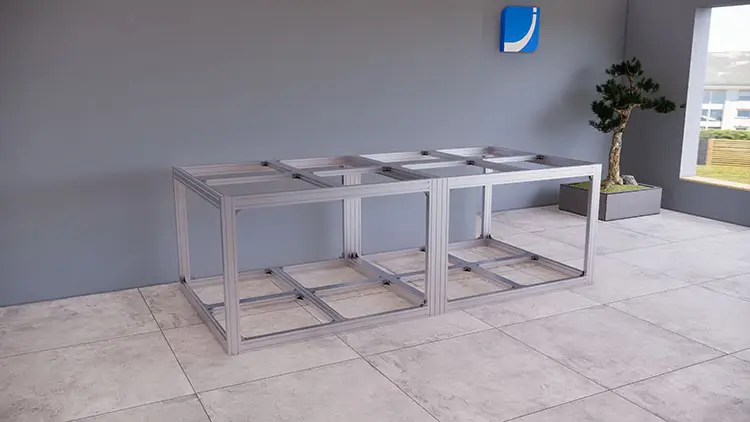
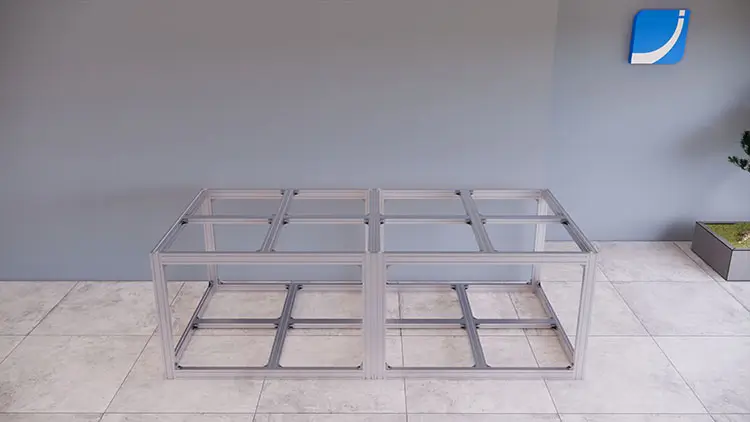
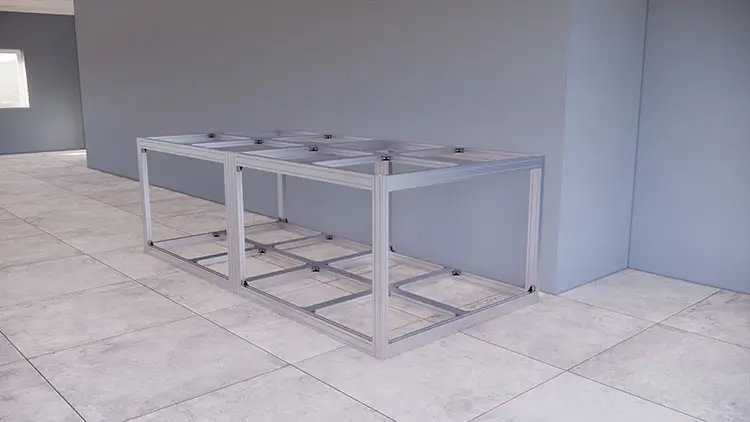
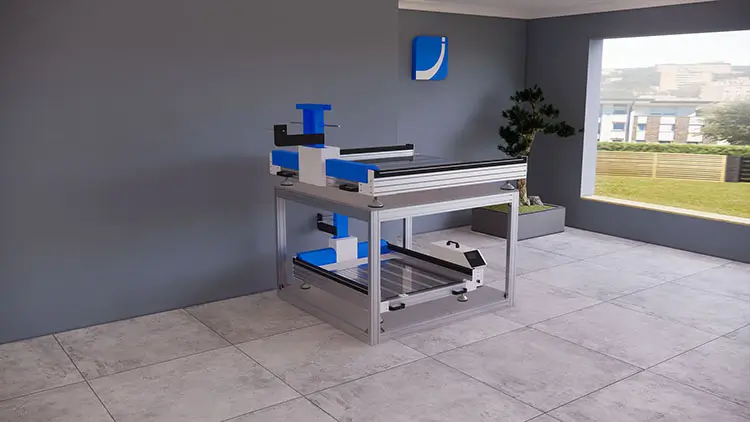
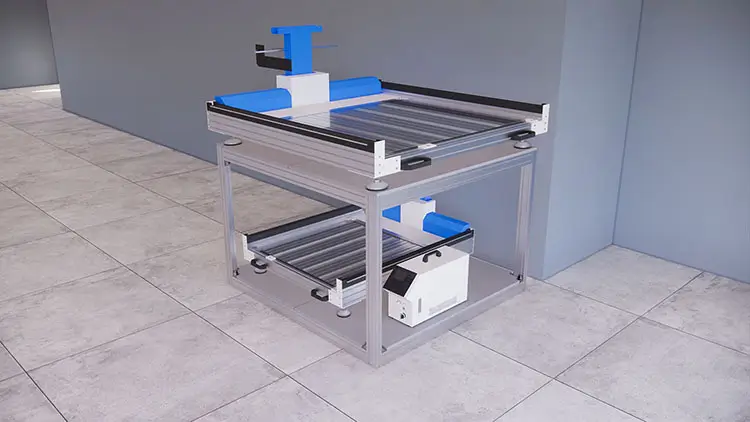
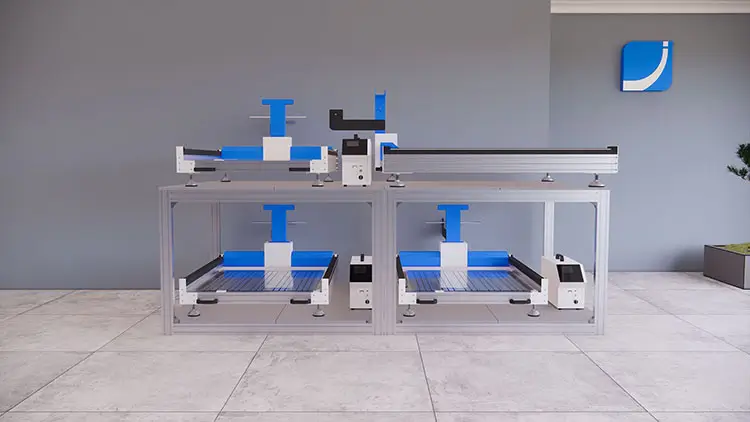
This is the instruction of how to assemble a 3D printer shelf step by step. It is a double layer shelf, also called a double layer table, designed not only for 3D sign printers, but also for some other different machines or products, it can help us save the precious space significantly, and load more machines or products in the same room.
Step 1 – Prepare Aluminium Alloy Bars
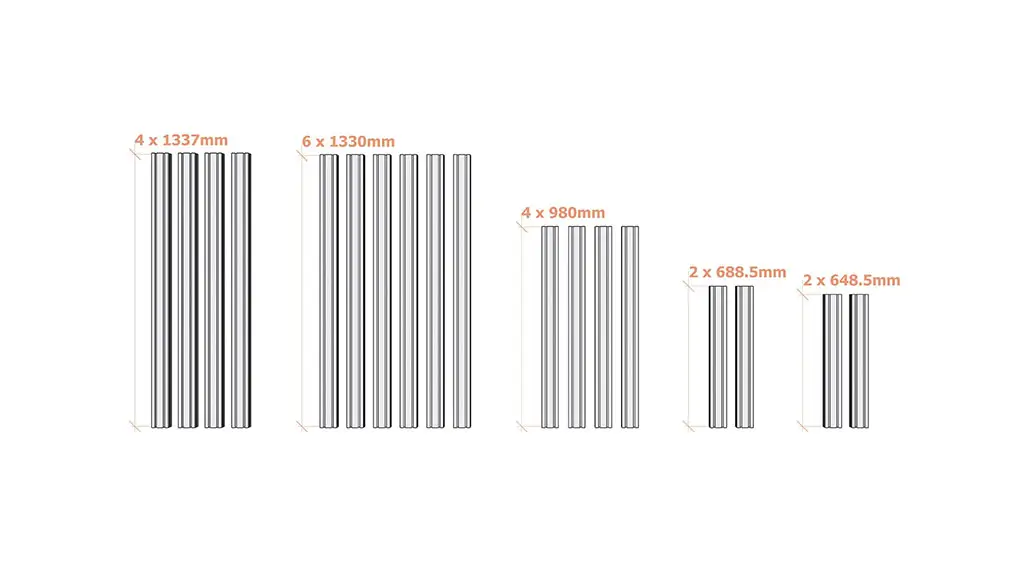
There are 18 aluminium alloy bars in total, including 5 different sizes. The separate quantities are as the followed: 4 pieces of 1337mm bars, 6 pieces of 1330mm bars, 4 pieces of 980mm bars, 2 pieces of 688.5mm bars, and 2 pieces of 648.5mm bars. They are shipped in flat package inside a fumigation free wooden box, so we need to assemble them according to this instruction step by step.
Step 2 – Prepare Assembling Accessories
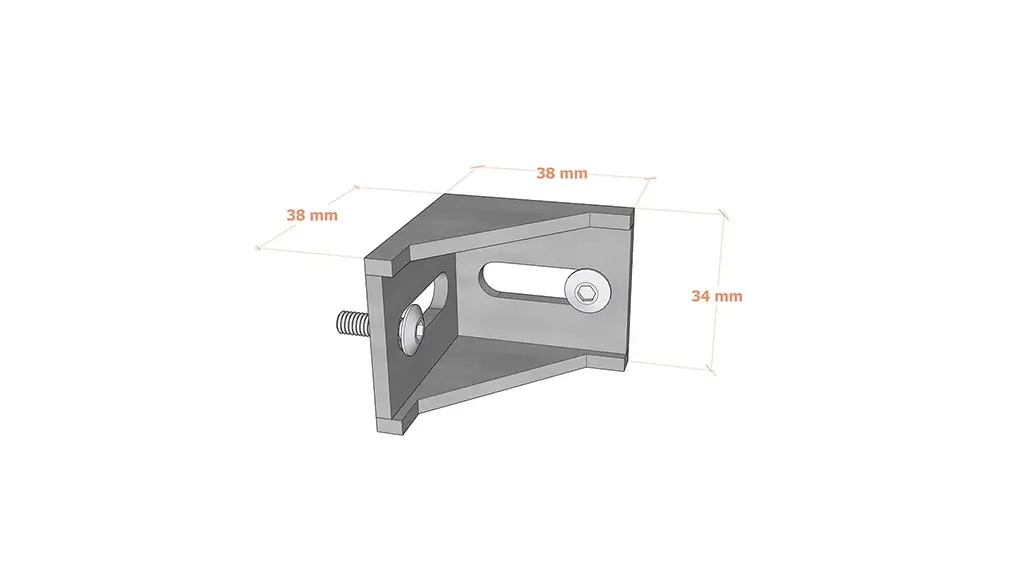
There are 40 metal assembling accessories in total, they will be delivered together with the aluminium alloy bars. Each accessory includes one triangular gadget and two screws.
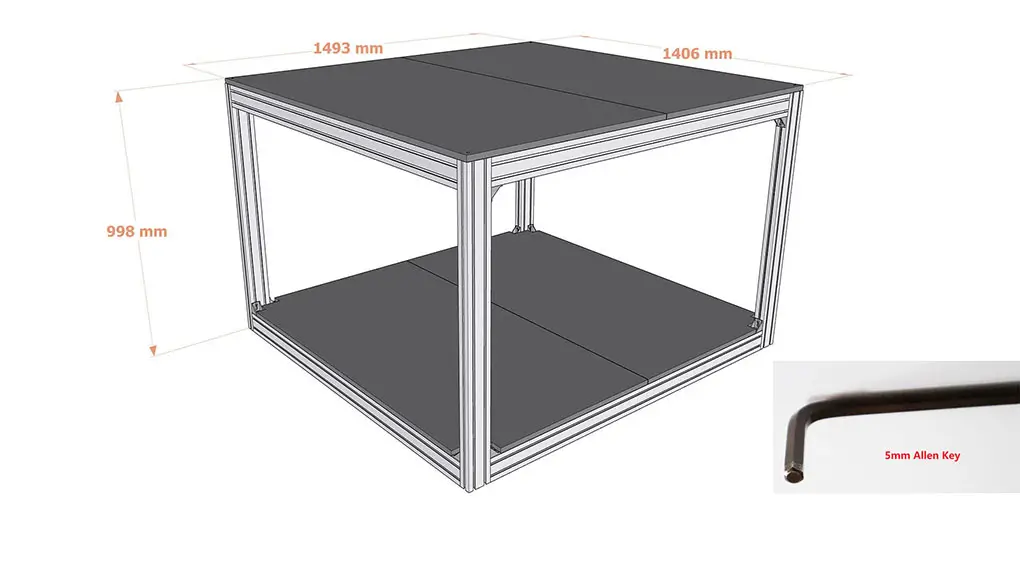
Step 3 – Prepare 5mm Allen Key
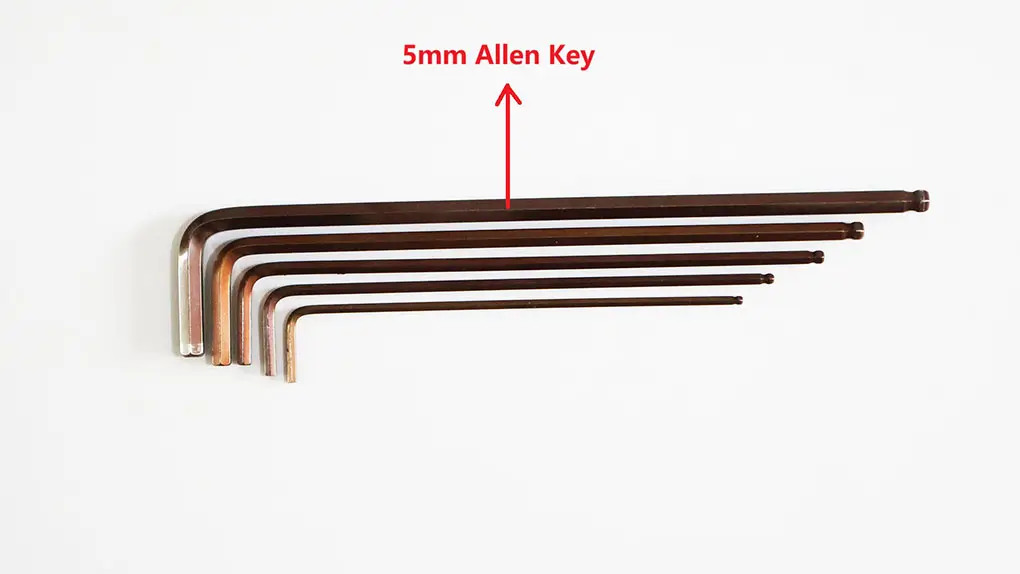
Let’s pick the biggest 5mm Allen key from our toolkit, it will be used to install and tighten the screws of the 40 pieces of assembling accessories.
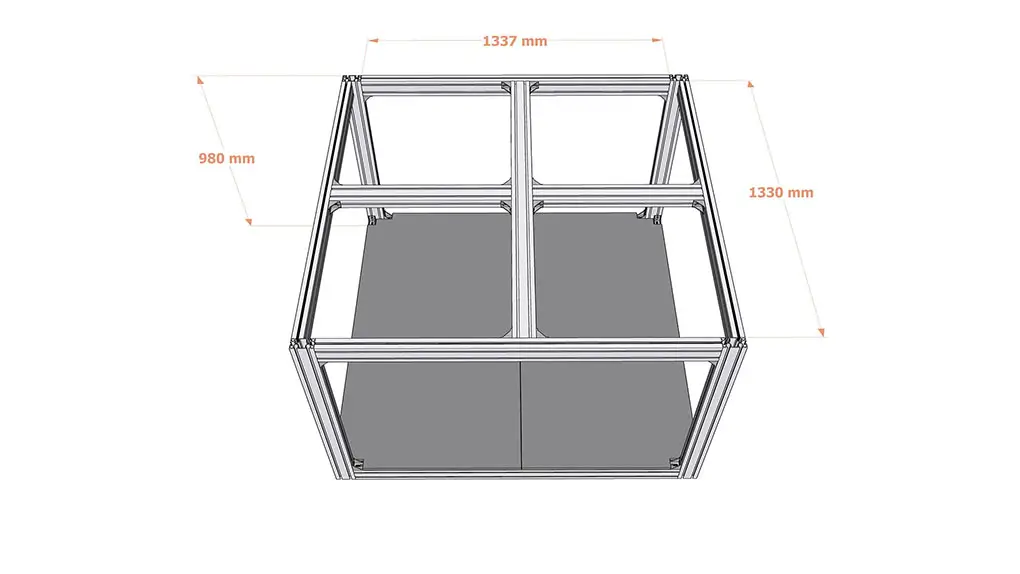
Step 4 – Assemble 4 Bars to Form a Rectangle
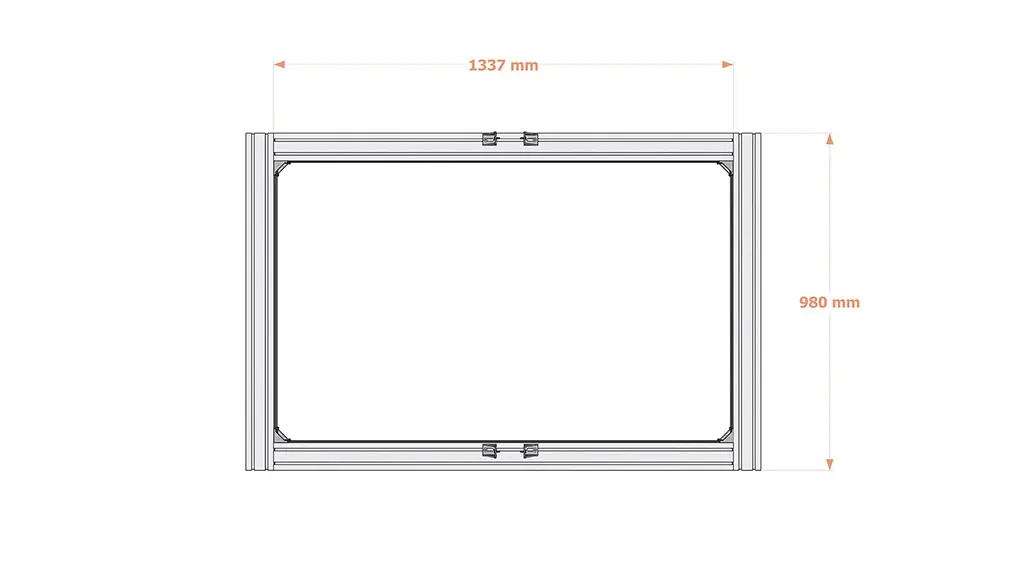
First of all, assemble 4 pieces of bars, 2 of them are 1337mm long, and the other 2 of them are 980mm long. 8 accessories will be used in this step, and a rectangle will be ready after this step.
Step 5 – Assemble 4 Bars to Form Another Rectangle
Same with the last step, assemble the other 4 pieces of bars to form another same rectangle, 2 of them are 1337mm long, and 2 of them are 980mm long. 8 accessories will be used in this step, and another same rectangle will be ready after this step.
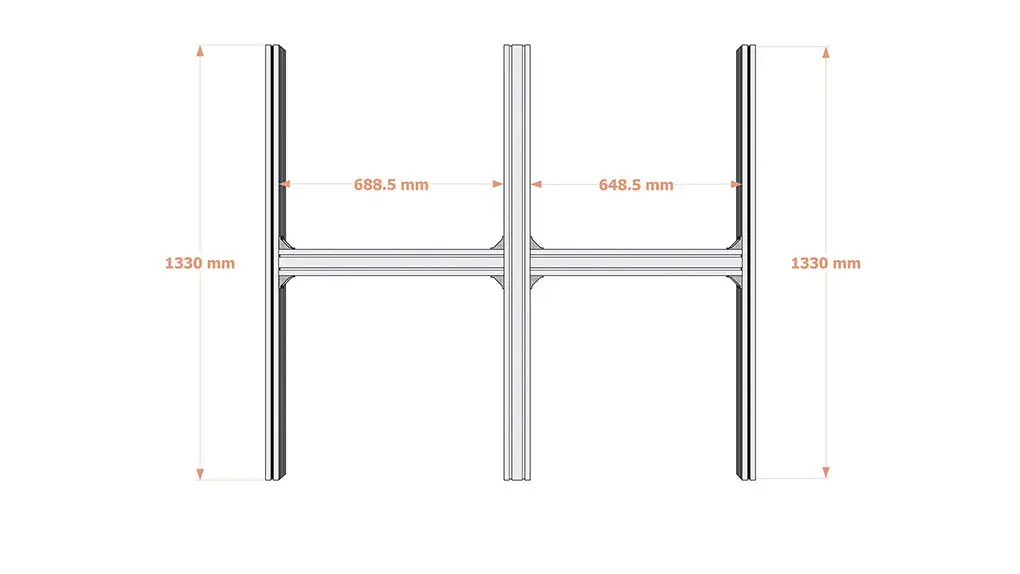
Step 6 – Assemble 5 Bars to Form a Shape as per Picture
This is the bottom frame, assemble 5 pieces of bars in this step, 3 of them are 1330mm long, 1 of them is 688.5mm long, and 1 of them is 648.5mm long. 8 accessories will be used in this step, and a shape same as picture will be ready after this step. Please note that the left and right bars are in vertical direction, and the middle 3 bars are in horizontal direction, the direction is very important.
Step 7 – Assemble 5 Bars to Form The Same Shape as Picture
This is the top frame, same with the last step, assemble the other 5 pieces of bars in this step, 3 of them are 1330mm long, 1 of them is 688.5mm long, and 1 of them is 648.5mm long. 8 accessories will be used in this step, and a shape same as picture will be ready after this step. Please note that the left and right bars are in vertical direction, and the middle 3 bars are in horizontal direction, the direction is very important.
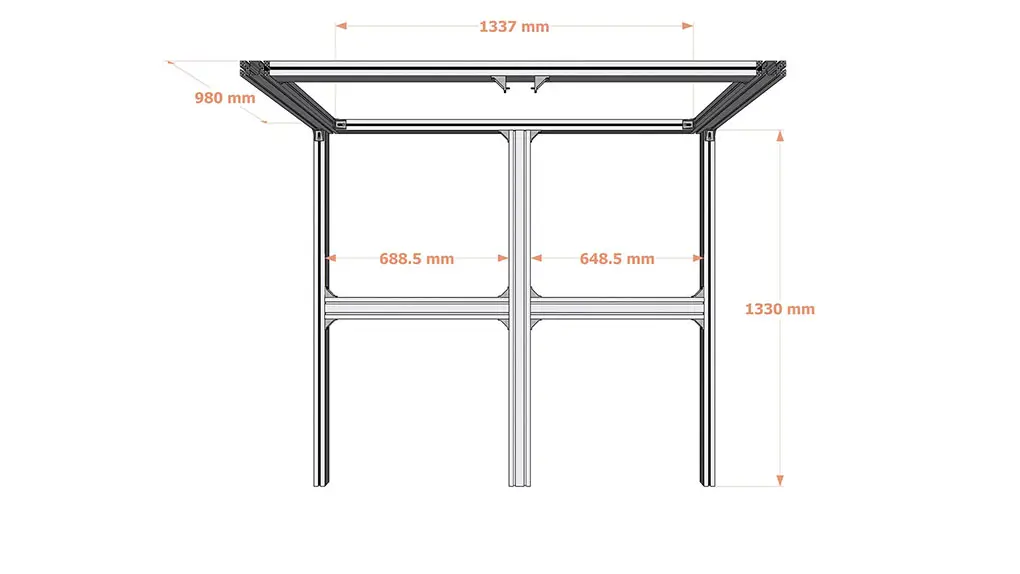
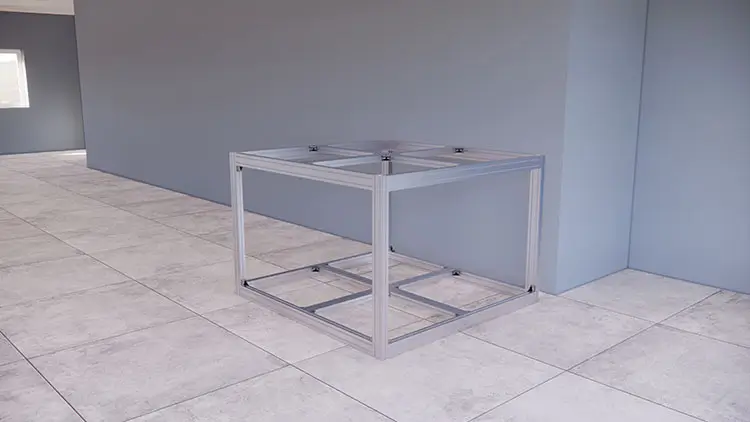
Step 8 – Assemble The Bottom Frame and One Rectangle
There are 4 pre-assembled parts ready till this step, 1 bottom frame, 1 top frame, and 2 rectangles. Assemble the bottom frame and one rectangle together, the rectangle will be on the side. 2 accessories will be used in this step.
Step 9 – Assemble Another Rectangle Together
Assemble the other rectangle on the side, 2 accessories will be used in this step, waiting for the top frame on the top.
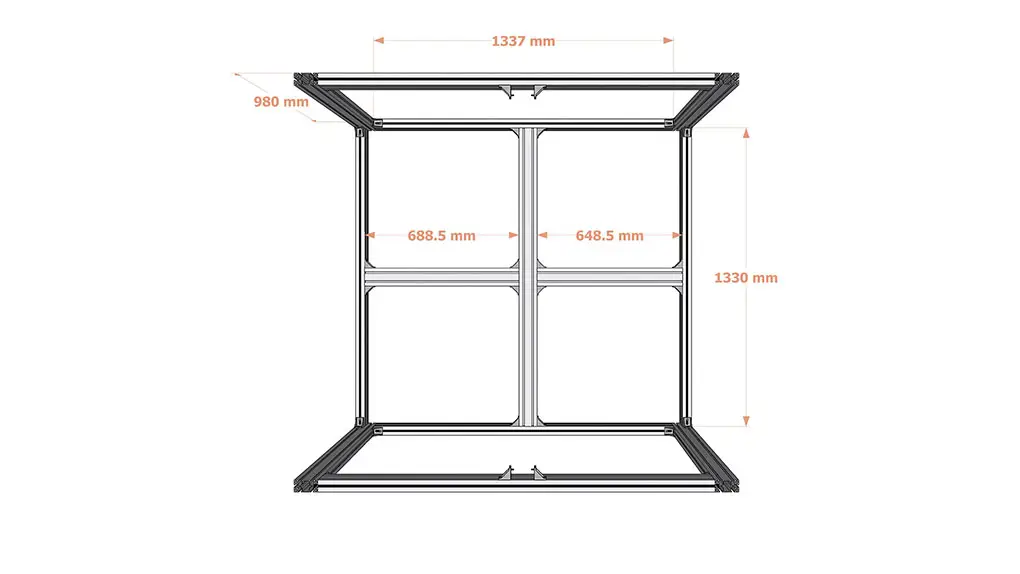
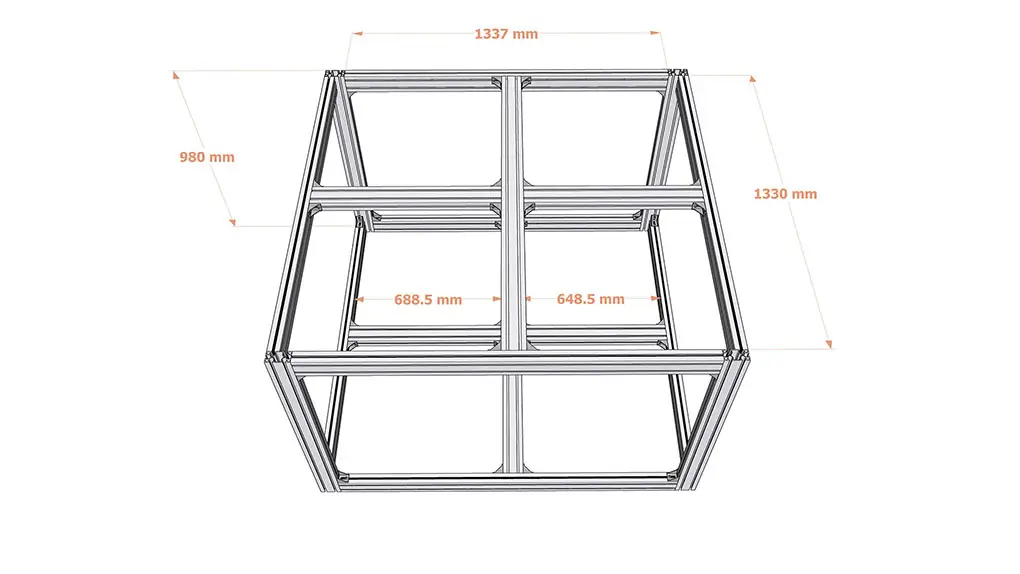
Step 10 – Assemble The Top Frame on The Top
Assemble the top frame on the top, so all the 4 pre-assembled parts are assembled together till this step, all the bars and accessories are completed now. 4 accessories are used in this step, and 40 accessories are used in total till this step.
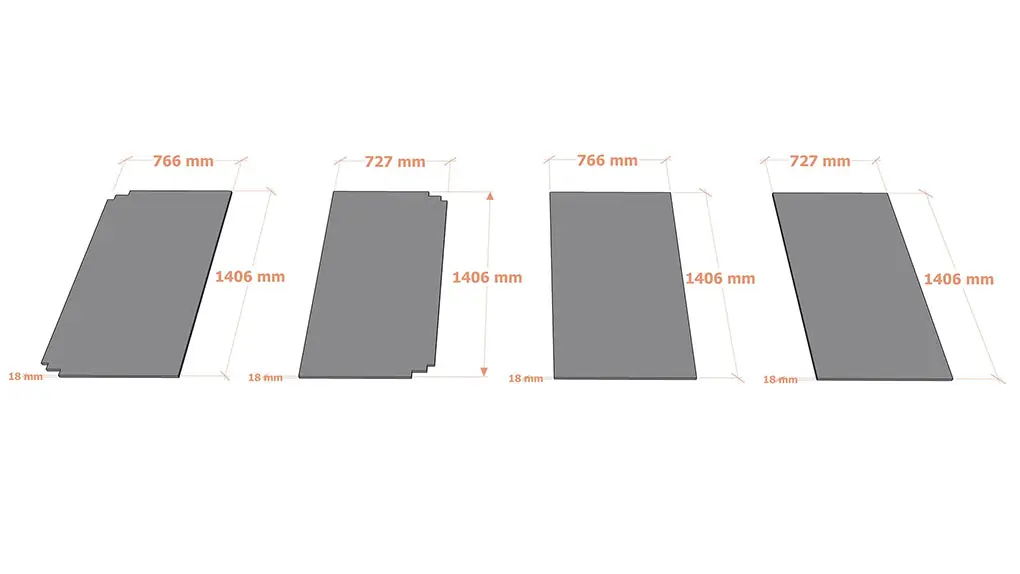
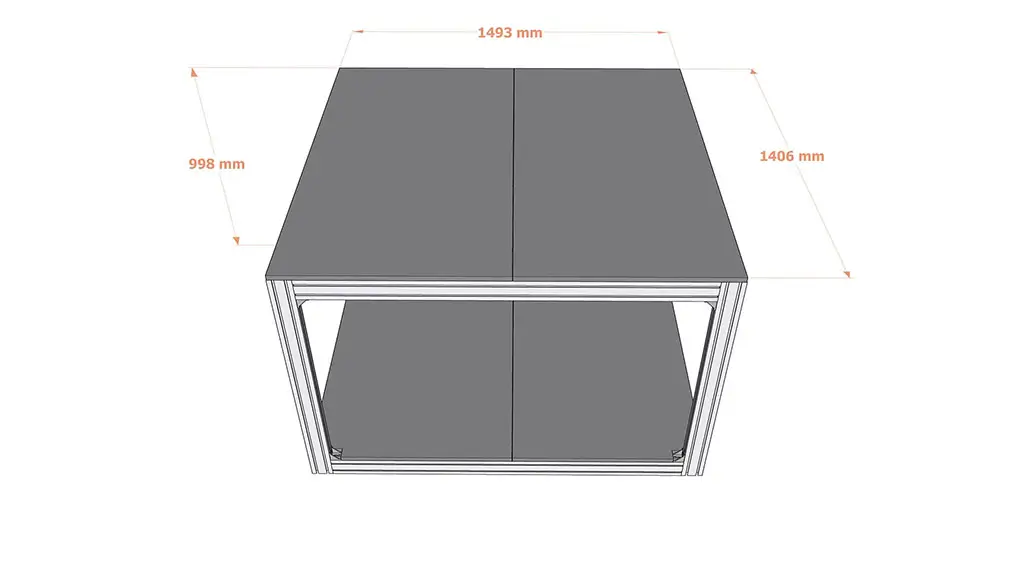
Step 11 – Prepare Wooden Countertops
There are 4 pieces of wooden countertops in total, 2 with unfilled corners are for the bottom layer, and 2 with normal corners are for the top layer. The wooden countertops are 18mm thick, and the sizes are as per the drawings. They will be used to hold the 3D printers or other machines.
Step 12 – Put Countertops with Unfilled Corners on The Bottom Layer
Put the 2 wooden countertops with unfilled corners on the bottom layer, no nails are needed in this step.
Step 13 – Put Countertops with Normal Corners on The Top Layer
Put the 2 wooden countertops with normal corners on the top layer, 4 nails will be needed in this step to make sure that the countertops are unmovable and stable on the top layer.
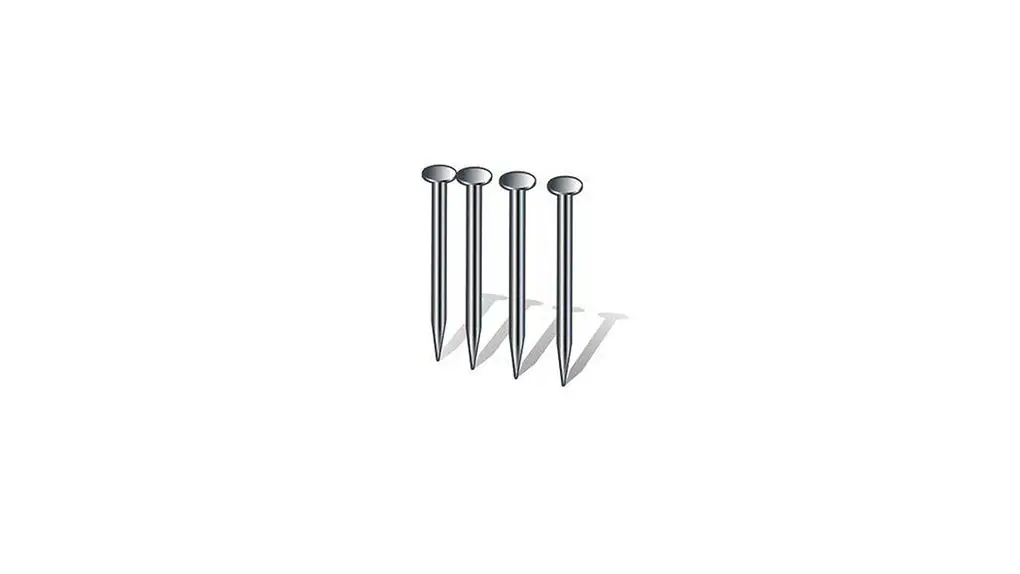
Step 14 – Prepare 4 Pieces of Nails
Prepare 4 nails, they will be used to make the wooden countertops on the top layer unmovable and stable.
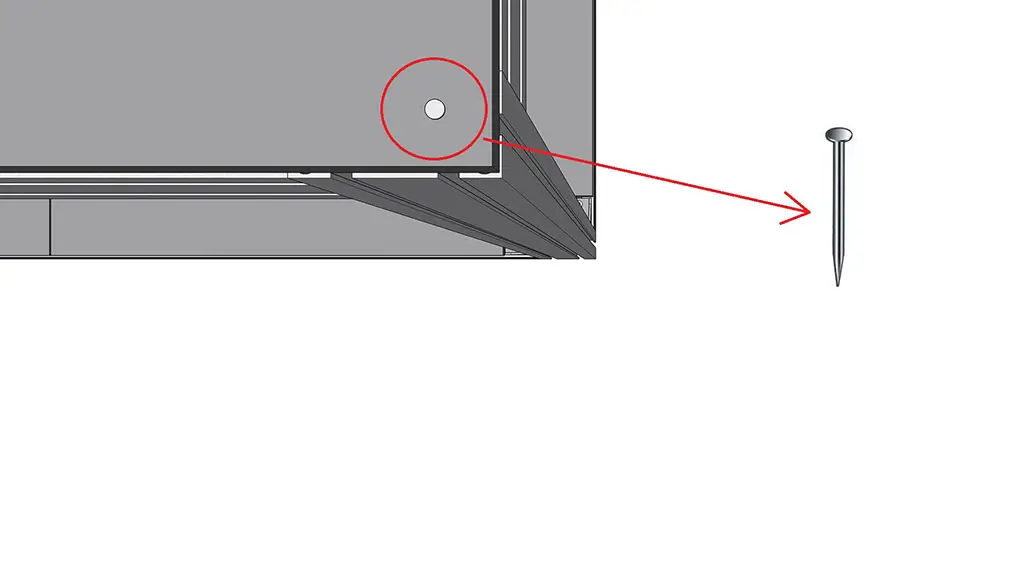
Step 15 – Drive The Nails in The Corners of The Top Layer
Drive the nails in the corners of the top layer countertops, 1 nail in each corner, 4 nails in total.
Step 16 – Tighten All The Assembling Accessories
Tighten all the assembling accessories, make them as tight as possible by 5mm Allen key. The 3D printer shelf (3D printer table) will be stable if all the assembling accessories are tight enough.