2 Different Colors on Face Panel of Signage YouTube

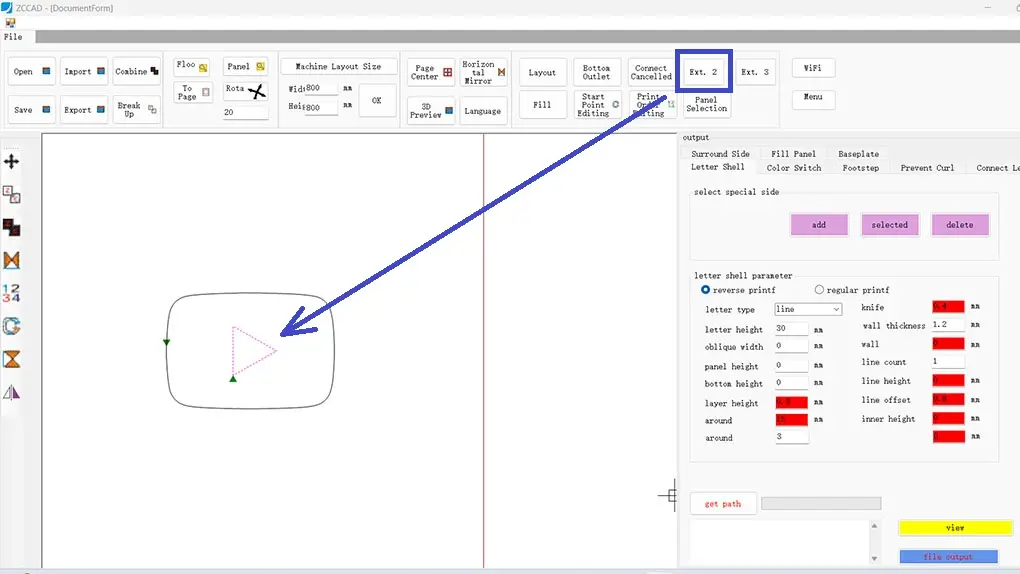
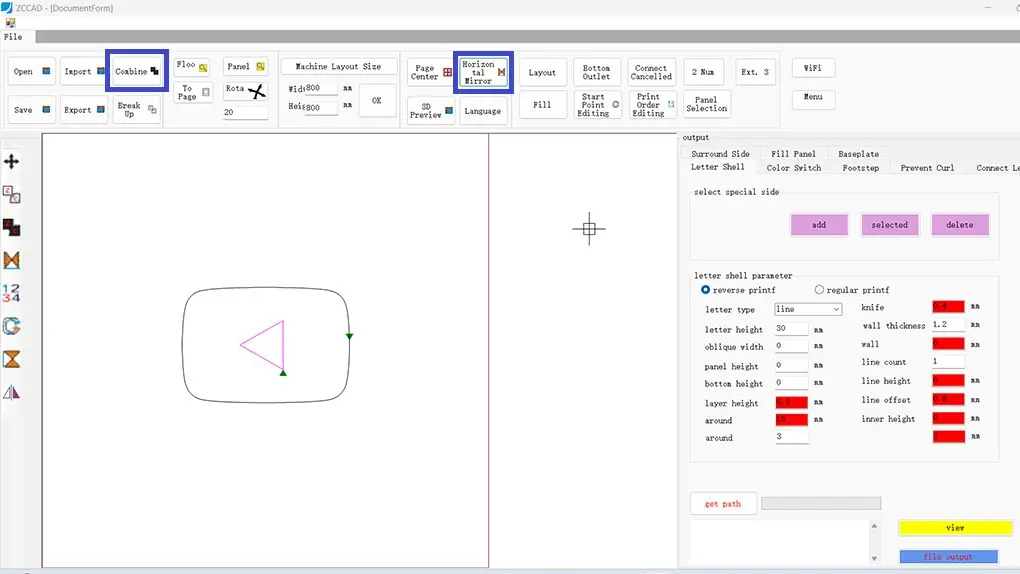
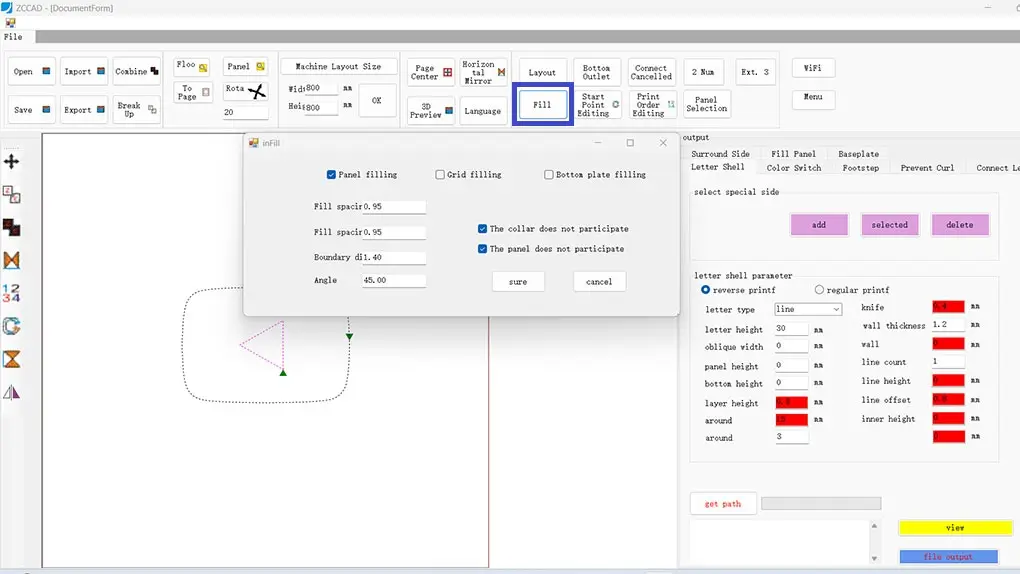
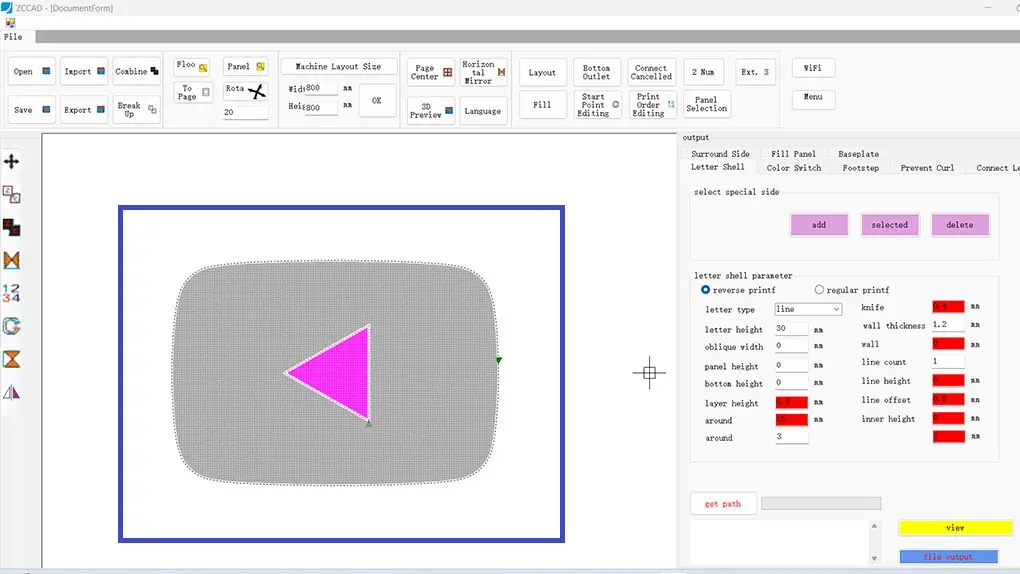
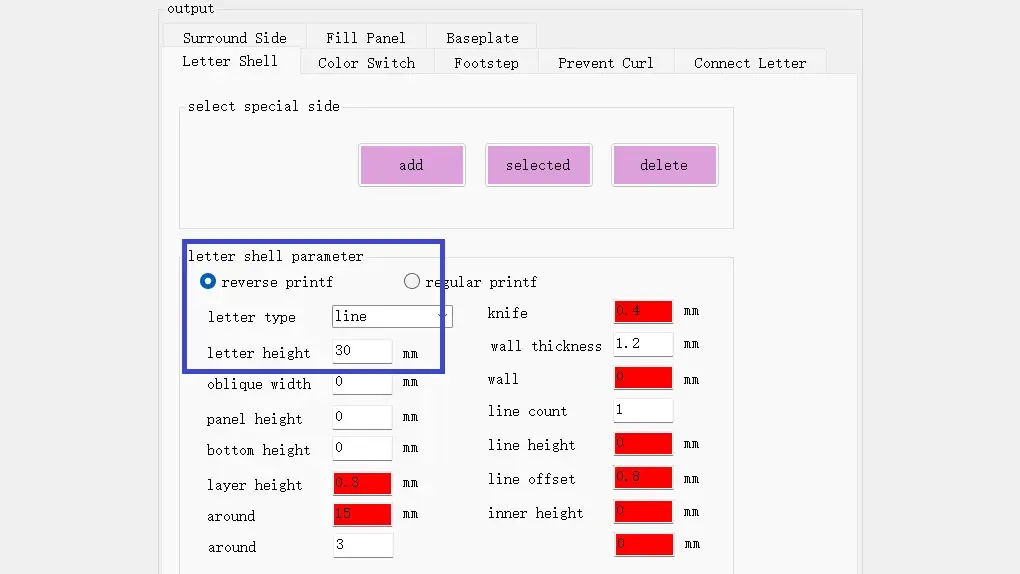
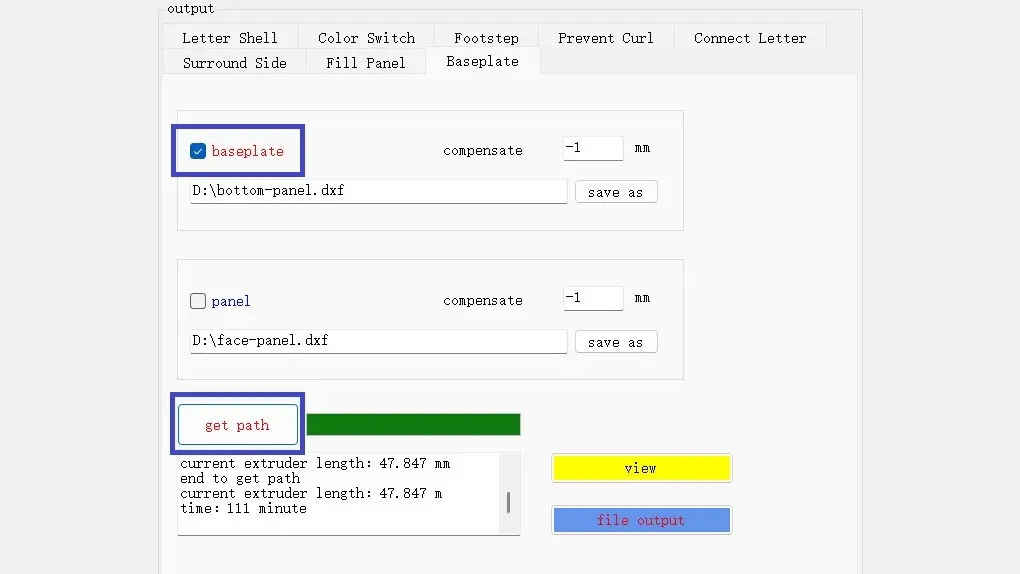
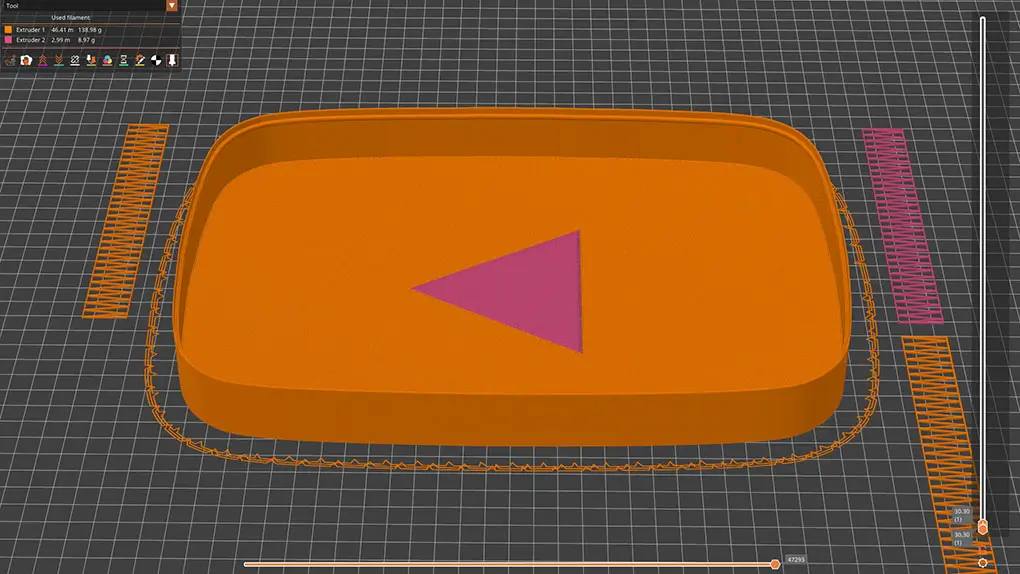
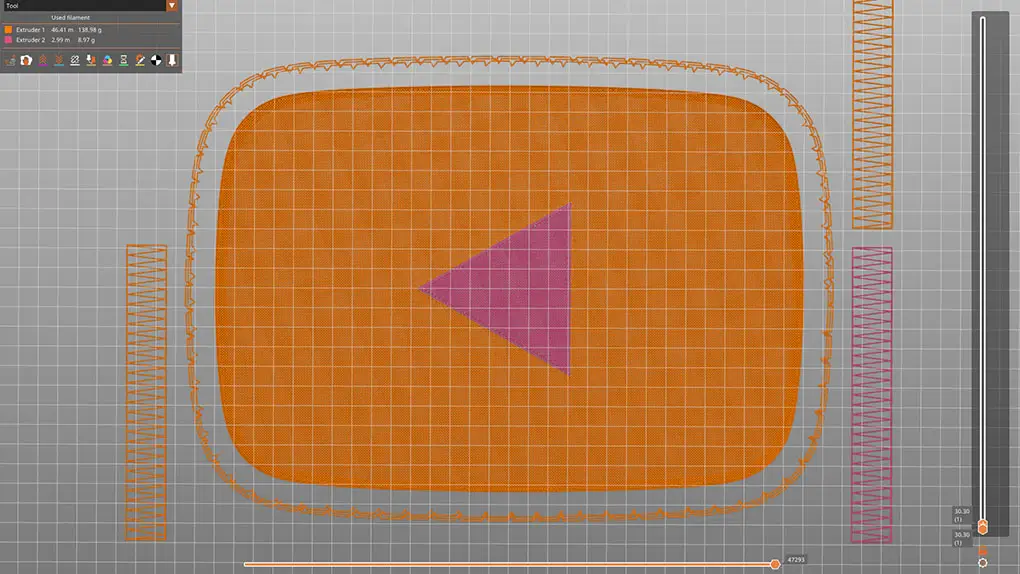
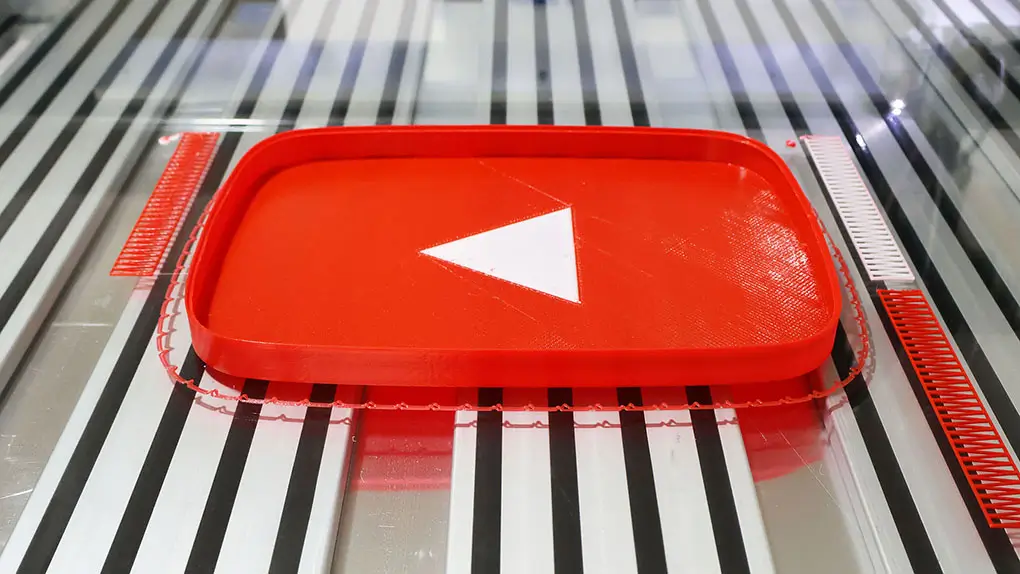
This is a 3D illuminated signage with two different colors on the face panel. The face panel is not made by UV printing, not solid acrylic panel, not liquid acrylic panel, it is made by IROGA 3D signage printer, the material is called 3D printing filament PETG-S which is UV resistant, high temperature resistant, low temperature resistant, and rainproof, it is good for long time indoor and outdoor use. This article shows the key steps to make the G-code 3D printing file in the 3D slicing software which is also called Iroga 3D slicer.

Iroga 3D Slicer to Make 3D Printing File for YouTube

Key Step 1. Import the DXF file which was made in the CorelDRAW, click “Ext. 2” and click the inner part of DXF file, then the inner part turns into pink color.

Dos Colores Diferentes en Panel Frontal del Letrero YouTube

Key Step 2. Click “Combine” and click “Horizontal Mirror”.

Iroga 3D Slicer to Make G-code File for YouTube

Key Step 3. Click “Fill” and tick “Panel Filling”, then set the parameters according to our requirement.

2 Colores Diferentes en Panel Frontal del Letrero YouTube

Key Step 4. Select the DXF file before we set the output parameters on the right column.

Iroga 3D Slicing Software to Make G-code File for YouTube

Key Step 5. Select “reverse print”, select “line” for letter type, and set 30mm for letter height.

Iroga 3D Slicing Software to Make 3D Printing File for YouTube

Key Step 6. Set the “Color Switch” according to our requirement.

Iroga 3D Slicing Software to Set Step for Bottom Panel

Key Step 7. Tick the first effective, but don’t tick the second effective in the “Footstep”, the first one is for bottom panel, and the second one is for face panel. Let’s assume the thickness of bottom panel is 3mm, then we can set 4mm for the first effective, which means 1mm more than the thickness of bottom panel.

Iroga 3D Slicing Software to Set Height for Face Panel

Key Step 8. Tick “panel color”, set the height according to our requirement, and select separate extruder 1 for “fill type 1”. (the printer will print one more layer, so in this case, it will print 1.2mm for “fill type 1”)

Iroga 3D Slicing Software to Output G-code File

Key Step 9. Click “get path”, then tick “baseplate” to save the DXF file for bottom panel, and output the G-code file for 3D printing.

2 Different Colors on Face Panel of Signage YouTube
Two Different Colors on Face Panel of Signage YouTube

Key Step 10. Check in the “3D Preview” before we print it, we can see that there are two different colors on the face panel of 3D illuminated signage YouTube.

3D Printed Lightbox YouTube
3D Printed Signage YouTube

Key Step 11. Print the 3D signage with 2 colors on the face panel via Iroga 3D signage printer.

3D Illuminated Signage YouTube
3D Illuminated Lightbox YouTube

Key Step 12. Install the 3D illuminated signage YouTube on the wall.